Showing posts with label Guide. Show all posts

Tuesday, February 24, 2009

SMN on Tiamat

...now I don't feel so lazy anymore.

OKAY!

So like, SMN is hella beast on Tiamat.

It's a damn shame that I never kill the thing anymore (yeah, right) but now I need to find a way to entertain myself, since I just woke my brain up.

Damn you brain, damn you!!

ANYWAY.

SMN on Tiamat is different from normal fights, since in the air you can only use basically Nether Blast... or Group 2 Merits... or whatever... basically you just can't use Predator Claws.

'Kay, Nether Blast (Group 2 Merits too) does not compare at all to Predator Claws.
It does like, 150 damage, versus the average of 500-600 of PC, with the chance of a like, 1.1k PC.

So your goal on SMN at Tiamat, is to get the most PCs off as possible while Tiamat is on the ground.

Tia stays on the ground for two minutes, or until the group killing her does 10,000 damage. (It's going to be two minutes, 9 times out of 10) Tiamat will also always stay on the ground if she is currently under the influence Mighty Strikes, but once it's over, she'll fly. (Tia loves that shit, fo'sho.)

Two minutes allows for 3 PC, if timed correctly.

You've got to get your first PC off as soon as Tiamat lands. No joke.

Then you rest one tic, and get back up, resummon.

If you've got about ~10 secs on your timer left, go ahead and make Garuda attack the dragon.

Your goal is to only hit the dragon once with a normal attack, to confirm range, and then hit PC instantly. The faster you are the better. If you're amazing and can confirm range without one normal attack, then kudos to you!

Dismiss instantly, do not let that dragon have TP!

Rince, repeat, always with the same promptness, or you're going to lose your third PC.

Once the dragon flies, take the time with /clock or whatever...

You can either:

A) Use Nether Blast once, for added damage, if you have the MP. ONCE ONLY and do it like it was a 4th PC, as fast as you can, you want your timer to be up for Tiamat's landing. You can usually do two or three rounds of PC > PC > PC > NB before you need to skip NB.
B) Rest your MP up to full, if you're low.
C) Go to the bathroom and not tell anybody (This is hella win)

At about 20-30 seconds before Tiamat lands, pull out your Garu-Beast, and get her all prepped.

Send her in at about 10 seconds to land

Caution here: Do not get Gardua killed. If she dies, you'll probably be too behind to make up time to get in the 3rd PC. Watch out for Firaga III, because that + Touchdown is sort of deadly.

Rinse and repeat 'til you get to 20%

At 20% the dragon starts PMSing, for freakin' real.

You want to avoid giving this thing any TP whatsoever.

So! You do the normal thing, except you run up to Tiamat, and just BP.

DO NOT ASSAULT ANYMORE! Assault = TP; TP = bad.

That's about it for the general fight. It's helllla boring :]

With the addition of Elemental Siphon, SMN is totally able to be self sustaining at Tiamat, without any form of Refresh, save their own. (This also makes COR the ideal support for a SMN party. PUP roll (Pet Acc) and BST roll (Pet Attack) rooock~! If you're running out of MP you're either:

A) Doing it wrong
B) Don't have a lot of hMP gear (like missing a Dark Staff or something o.O?)
C) Not resting

Useful Thing: Elemental Siphon and Stoneskin have the same "timer" (5:00 recast on Elemental Siphon; 5:00 duration on Stoneskin) They also take up the about 30 seconds you've got to rest between PCs. So you can replace a resting session to do Elemental Siphon > Stoneskin. (Order doesn't matter, I just do it that way for macro reasons) If you repeat this process, you'll get the most MP back from Elemental Siphon up as possible, and you'll always have Stoneskin up.

Why in the world does it matter?:

More damage means the dragon is dead faster.
Dragons being dead faster = less boredom, less time spent, drops faster, and the most important reason!
The less time the thing is alive, the less time there is for someone to mess up/mages to overhate. Tiamat is a hard beastie, and after about an hour of two, depending on the mages, people are going to pull hate. So if it's dead in an hour, well, you've just saved lives, and made the whole fight less stressful. PLDs sometimes mess up too :] and God knows a tank dying at Tiamat is terrifying XD

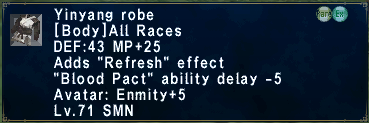
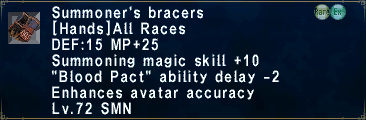
Extra Note: PAY ATTENTION TO WHAT YOU'RE DOING! People tend to get mad when other people wake dragons up from ES Sleeps in bad situations. Always keep an eye out for what is going on, and stay awake, no matter how bored you are! Also, -BP delay gear is hella awesome, if you don't have any, go get some! :]

Some useful gear for -delay: (The Austere Robe Set is also a cheap alternative, notably Hands/Head)


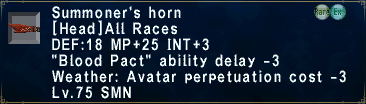
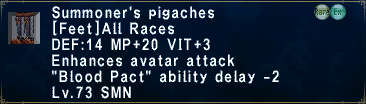
* I don't have Summoner's Spats on this list because Oracle's Braconi, or Marduk's Shalwar beat 'em out. I don't know if I'd use AF2 Pants over AF1 Pants, but if I didn't have a whole lot of -delay gear, I would!

Wednesday, October 22, 2008

WHM Sub Jobs

A WHM's sub job is a very important thing to have right.

Sometimes you really will need that ES Slow.

...or that super cool half mp thing that allows you to nuke with banish moar!!

Just kidding.

Anyway, WHM sub jobs!

Scholar
Oh my God, I love SCH sub. -10% MP for all white magic, shorter casting time, Conserve MP, strategems, and Dispel! How could you not love SCH sub?! It's amazing. Personally, I'd use SCH sub 24/7 if it were not for the need of ES Slow or traveling purposes. (Whoever runs around without /BLM is crazy...) The only downside of SCH sub is no Warp. Damn, sometimes I really miss Warp.

Black Mage
BLM used to be the best sub for WHM (imo). Conserve MP, ES, and access to Sleep, Escape, and Warp are all very good things.

Summoner
I used to live by WHM/SMN, now I laugh at them. Yes, the MP gain is cool, and you get Auto-Refresh. That's just dandy. But the limited BPs you have with a SMN sub doesn't nearly make up for the abilities you lose by not subbing BLM or SCH. Also, Conserve MP will help more in the long run than Auto-Refresh! Seriously! So basically, don't use SMN sub unless you're doing something really weird or just playing around... I don't know if there's even anything to use SMN sub on anymore...

Red Mage
RDM is a great sub for BALLISTA. It really shouldn't be used for much else... Fast Cast is amazing, and having easy access to Dispel is cool, so is Phalanx, but once again, you're sacrificing the abilities of BLM or SCH sub for small things. On the other hand, RDM sub is kinda cool for soloing, or just playing around. It's not a bad sub but there's definatley much better.

Ninja
WHM/NIN is great for melee WHM! Yess, go melee WHM! :] ...but that's about it. You can use it on like King Vinegarron... if you ever get the chance to kill it... some people sub NIN to Ultima... but you're basically sacrificing your sub job for another club and Utsusemi. Not worth it unless you're doing something special (or meleeing in campaign!)

I really can't think of anything else anyone else would sub... so I guess I'm done!

Also, a WHM subbing SMN inspired this post :]

Friday, October 10, 2008

WHM Magic

Do you know why a WHM is called a White Mage?
Is it because we do killer damage with our hardcore Banish nukes!?
Hell no it isn't!
C'mon people, get real.
Seriously. Cast Regen instead of it, okay?

Anyway, a rundown of what a WHM actually does.


Cures - Cure, Cure II, Cure III, Cure IV, Cure V

1. Cure - you're basically only going to use this at lower levels. It's only going to heal about 40 HP at the most, but very useful due to its low MP cost to wake people up with.

2. Cure II - this cure is a God send in Valkrum Dunes. It heals anywhere from ~62-114 HP, depending on your level and gear. It's great for a quick fix.

3. Cure III - Horray, Cure III! This cure heals about ~180 HP. It also generates a good amount of enmity. It is about your staple cure at 75.

4. Cure IV - Cure IV generates quite a bit of enmity and could possibly put you over your tank's hate and get you smacked around a bit. Try to avoid it if possible, and generally, if somebody isn't dying, throw out a Cure III instead. It heals about ~420 HP.

5. Cure V - the grand daddy! Cure V is the fattty! Stack as much MND
(MND > Healing Magic) and Cure%+ as possible. It has a hefty MP cost of 135 MP. Only use in emergencies, to try and save MP. Generates less enmity generally than Cure IV. HP recovered depends on the WHM casting! :]

--All cures deal damage to undead.


Curaga - (I, II, III, IV)
--AoE Cure spells. Great for waking everybody in your party up quickly or getting everybody's HP up. Can cause a lot of enmity and can have a beastly MP consumption. Divine Seal + Curaga after a fight = good; during a fight = bad.


Regen - (I, II, III)
--Regen is the most MP conservative spell in the game. Especially during low levels, it is the most amazing thing. Always stick it on your tank, because they will love you for it! Once you reach higher levels, and more fast-paced fights, Regen may take a bit too long for your liking to cast. Also, in fights with multiple healers, the other healers may heal your target to full, making your Regen useless anyway. It personally drives me mad! Regen is your best friend that you must use wisley.


Status Removal Spells (-nas)

1. Paralyna - removes paralysis. 12 MP, short recast.

2. Silena - removes silence. 24 MP, short recast.

3. Poisona - removes poison. 8 MP, short recast.

4. Blindna - removes blindness. 16 MP, moderate recast.

5. Stona - removes petrification. 40 MP, short recast.

6. Viruna - removes plague and disease. 40 MP, short recast.

7. Cursna - removes curse and doom (doom less likley to be removed, additional casting or Cursna will probably be required) 30 MP, moderate recast.

--DD and/or tanks will generally yell and scream until they receive the -na they are asking for. Don't feel bad - and its always okay to tell them to shut it sometimes. :] You'll use Cursna and Viruna the least, the first five more, depending on the monster.

Erase
--Erase is your cure-all for other status alignments such as Attack Down, Defense Down, and Evasion Down. It removes alignments such as Bio and Dia, but will not remove a regular status alignment. It has a moderate recast, but it isn't too bad. 18 MP.


Raise - (I, II, III)
--People love WHM for the spell Raise. It revives a "dead" player, and recovers some experience lost due to the death. All of them have a high MP cost though, 150, 200, and 250, respectively, and an even longer recast time. Generally in a party, you're going to want to wait if a member dies to Raise them so others don't die in the process, but if you have the time and spare MP, getting them up as soon as possible is good, too.


Reraise - (I, II, III)
--Reraise does the same thing that Raise does, but it is a self-target spell for the WHM only. Reraise is a spell that should always be on. If it drops, you need to get it back on fast, because in the five minutes you wait to put it back on, your party is going to wipe. Yes, the game does hate us all. It will also become your best friend for exploring dangerous areas.


Protect/Shell - (I, II, III, IV, V*)
--These are your basic "buffs". They are important to keep up, especially shell in situations where you or your party will be dealing with a lot of magic damage. They last 30 mintues. WHM has Protectra and Shellra which allows the WHM to cast buffs in an area of effect (AoE) for the MP cost of a singular buff. WHM also recieve the singular versions of these buffs.

* aquired through merit


Barspells
--Barspells are more "buffs" that give the player and others in the AoE a certain resistance to an element.

Wind > Earth > Thunder > Water > Fire > Ice
Light <=> Dark

These spells are extremley useful. Each element corresponds with a status alignment. WHM recieves the basic 6 elements, but not Light and Dark.
Wind - Silence, Gravity
Earth - Slow
Thunder - (generally used to prevent magic damage, usually opponet's element of choice)
Water - Poison
Fire - Disease
Ice - Bind, Paralyze

By casting these spells, you may increase the chance that you and/or your party members may resist the corresponding status alignment.

There is also a 2nd set of barspells. These spells reduce the duration of a status alignment.
(Barpoison, Barblind, Barparalyze, Barsilence, Barblind, Barsleep, Barpetri, and Barvirus.)
WHM recieves only the AoE version of both sets of barspells, which isn't a bad thing! These take a bit to cast and generally a WHM doesn't use them often. They are helpful though.


Stoneskin
--Stoneskin is an earth based spell that absorbs damage for you! Once you get this spell, you're going to want to stack as much MND as possible. It is very easy for a 75 WHM to reach the cap. Stoneskin will allow you to rest even if you are hit, that is until it wears. It is a life saver and a buff to keep up constantly. Due to its longer casting time, try to put Stoneskin up before combat. Generally it'll take one or two hits for you, depending on the monster. It will cap at 256 Enhancing Magic and 94 MND (total). Stoneskin lasts 5 minutes.


Blink

--Blink is a spell that absorbs damage for you using shadows. It isn't always totally reliable, but it is a good spell to have up. It takes about the same time to cast as Stoneskin, and lasts 5 minutes.


Aquaveil
--Aquaveil helps reduce casting interruptions. Its a nice spell, but not necessarily a buff you need to keep up constantly. Lasts 5 minutes.


Haste
--Haste is a fabulous spell that increases your target's attack rate and lowers his or her recast timer. 40 MP sucks, but it is totally worth it. It lasts approximately 3 minutes. (Tip: Cast a Barspell before your Haste order to give yourself a reminder of needing to refresh the cycle.) Always try to keep Haste up if you can. Very important to especially tanks and DD who use shadows.


Enfeebling Magic
--As a WHM, your enfeebling magic isn't top notch. As a rule of thumb, if there is a RDM present, let them do it.

1. Paralyze - paralyzes a target. Super useful, since it can nullify a monster's attack completely. Stack MND and enfeebling magic+ gear. If the mob is resistant, add more enfeebling magic gear than MND, and if it isn't add more MND. Ice based spell.

2. Slow - slows a target. You basically just want to get this spell on. Slowing a target makes it attack slower, which means overall, less for you to heal. Earth based spell. After making sure you can stick this spell to whatever monster, stack MND.

3. Silence - silences a target. Stack enfeebling magic and magic accuracy+ gear. Wind based spell.


Repose
--Repose is a light-based sleep spell that lasts for a minute and a half (1:30). It is amazing. It has a decent recast timer, but it generally isn't a problem. It hardly ever resists, unless your Divine Magic is lacking. Great for helping out sleepers in dynamis or other events. MND might help Repose but it might not. Its never a bad thing to stack MND while playing WHM. :]


Banish and Banishga
--Banish is a single target light based spell that does damage and lowers an enemy's defense for a short time. Banishga is the AoE version of the spell. Compared to other damaging spells, Banish isn't the greatest thing to cast. You're going to want to save your MP for other things. A good time to use Banish though is if you/your party/alliance are fighting a ghost type mob. It is based off of your Divine Magic, and adding MND will help with the spell overall.


Teleportaion Spells
--Teleportation Spells are spells that transport you and qualified party members to a "telepoint" somewhere in Vana'diel. All teleports have a long casting time, and use anywhere from 75-100 MP.
1. Dem, Mea, and Holla - your three basic spells. These Transport members to their respective crags and also allow quick acess to Lumoria (sea).
2. Yhoat and Altep - these teleports transport members to the more remote areas of Yhoatar Jungle and Eastern Altepa Desert, respectivley.
3. Vazhl - transports members to Xarcbard.
4. Recall-Meriph, Recall-Pashh, Recall-Jugner - teleportation spells that take members to the past, to the respective telepoints.


Deordorize, Sneak, and Invisible
--These three spells lessen the chance that a monster will be able to smell, hear, or see you. Be careful though, some monsters may attack you due to your casting, so always be aware of your surroundings.